


Cute, huh? Yes, it really is the Bug under there! :)
And then I realized that all you other Bug owners might want one, too, so I created this tutorial. I hope you enjoy it!
Supplies:
13x34 piece of fabric (washed and dried for shrinkage)
sewing scissors
pins or tape
thread and a sewing machine
elastic (optional, I'd choose 1/16" or 1/8")
From your main piece of fabric, cut a 12x19 main piece. Be sure to allow an extra 1/4" seam allowance on all sides. Download the end piece here. Cut it out and pin/tape onto the remaining fabric (you do not need to allow an extra seam allowance). You need TWO of those pieces, so lay them out before you cut.
Lay out your main body piece (12x19 plus seam allowances) right side up. Lay down one of the end pieces onto the main piece, right sides together. About .5"-.75" of the end piece side will hang over the side of the main piece. Pin or tape your pieces together. Do the same on the other side, being sure to leave that overlap.


Fold your end pieces in half - take the edge that is not pinned and fold it toward the pinned edge. Fold down the top of your main piece and keeping the right sides together, pin the other half of your end pieces to the main body.
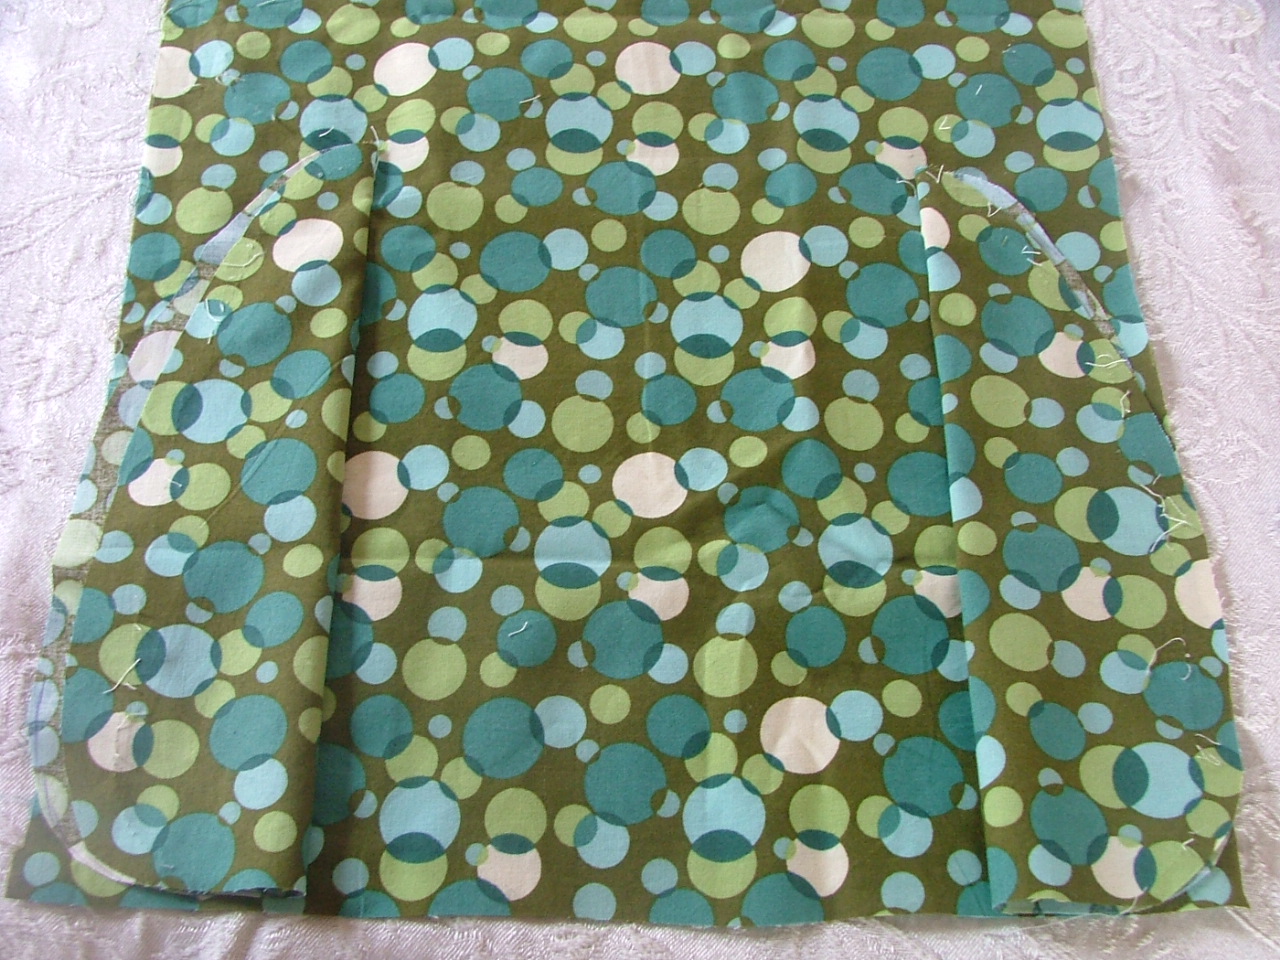
This gets a little tricky. It helps to trim the excess fabric curve in the middle (at the top of your end pieces) once you've folded the main piece over. When you're done, you'll have your cover shaped and it should be entirely inside out.

Now stitch your pieces together and remove the pins/tape, then turn it right side out. Try it on your Bug and see how it fits!
Finishing the bottom seam is your last step. You must decide if you want elastic on the bottom. I did not, but if you chose to add it, it's easy - make sure you make your seam casing large enough for your elastic width. Put a pin in the end of your elastic, feed it into your casing, and pull it through the end. Then stitch it closed!
Ta-da! Covered Bug!
Custom covers are available for a reasonable cost! Email for details - jmueller409ATyahooDOTCom.
You are welcome to share this tutorial far and wide. As always, please give credit where credit is due. This is for your personal use only.
Jen